Disclaimer: As an Amazon Associate, I earn from qualifying purchases. Links in this article may be affiliate links.
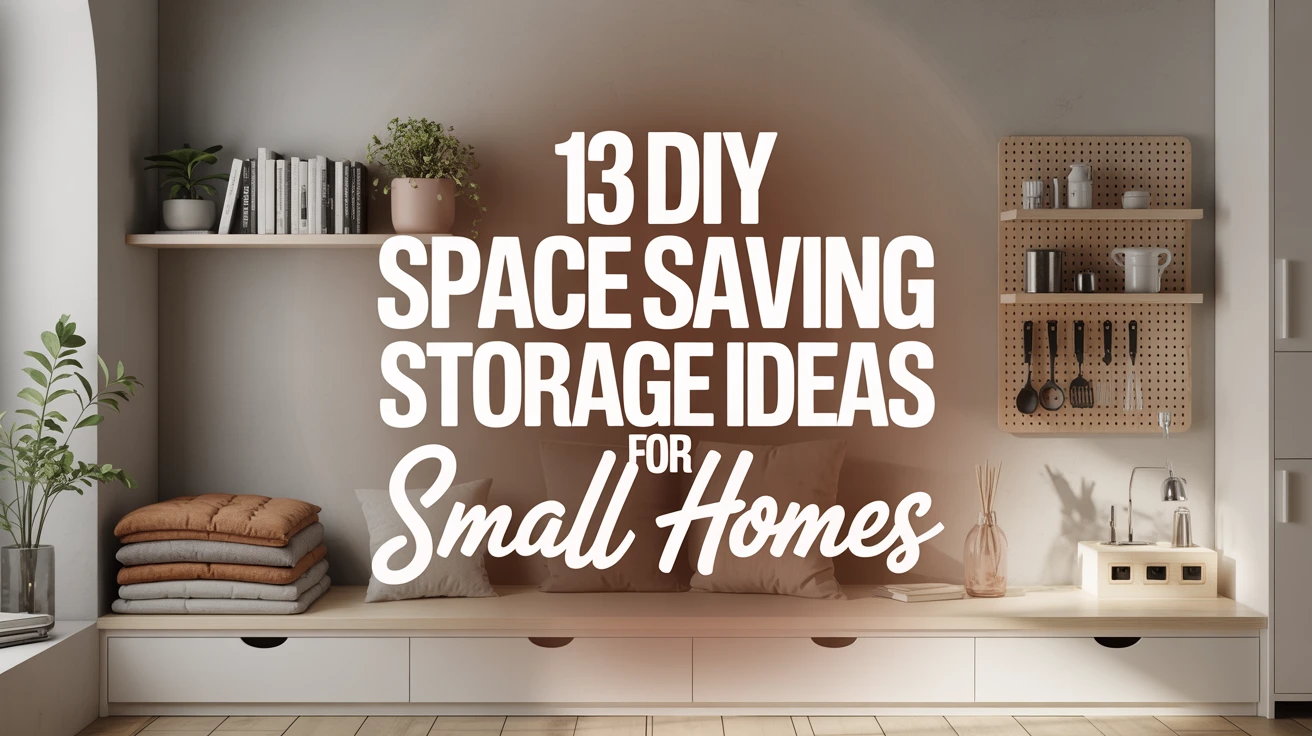
The Art of Space Saving in Small Homes
Living in a small home doesn’t mean you have to compromise on functionality or style. As someone who’s navigated the challenges of tiny apartment living for years, I’ve discovered that the secret lies in creative DIY space saving storage ideas. When I first moved into my 500-square-foot apartment, I was overwhelmed by how quickly clutter accumulated. Through trial and error (and yes, a few collapsed shelves), I’ve mastered the art of maximizing every square inch.
The beauty of DIY storage solutions is that they’re customizable to your specific needs and space constraints. Plus, they’re often more affordable than store-bought alternatives. I’ve compiled my 13 favorite space-saving hacks that have transformed my small living space into an organized, functional home. Let’s dive in!

- Adjustable louvered roof lets you control sun, shade, and airflow.
- Built-in gutter system keeps the area dry during rain.
- Durable powder-coated aluminum frame resists rust and weather.
- Includes waterproof curtains and mosquito netting for privacy and protection.
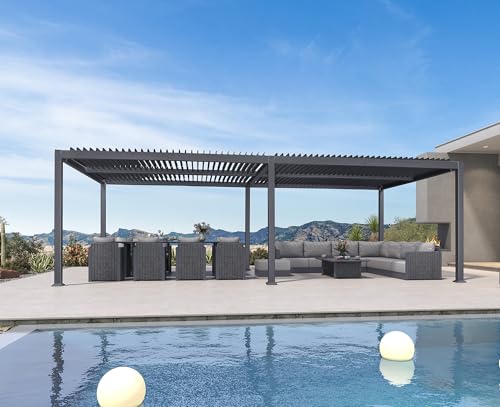
- Smooth contours and seamless design
- Up to 325 square feet of shaded paradise
- Features 4.53×4.53 inch reinforced columns
- Say goodbye to water buildup woes! Our innovative drainage system of this hardtop pergola discreetly whisks away excess water
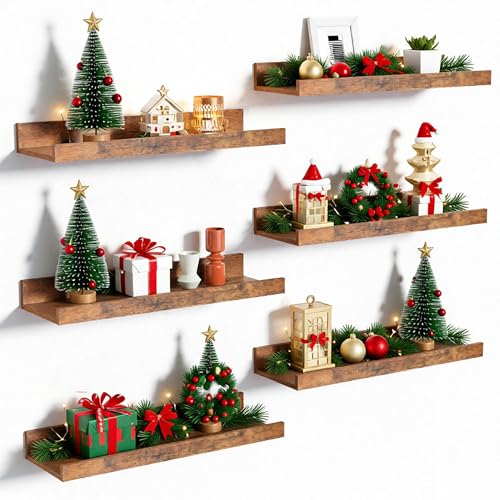
1. Wall-Mounted Shelves

One of the most impactful changes I made was embracing vertical storage. Wall-mounted shelves utilize unused wall space while keeping floors clear – a game-changer in small rooms.
- Floating shelves – create a sleek, modern look with hidden brackets
- Corner shelves – make use of often-wasted corner spaces
- Picture ledges – perfect for books, frames, and small decorative items
- Bracket shelves – offer more support for heavier items
I installed floating shelves above my desk and was amazed at how much office clutter they absorbed. The project took just an afternoon and cost less than $50. If you want an easy starting point, you can begin with a ready-made set of floating wall shelves and then style them to match your decor.

View on AmazonAs an Amazon Associate, I earn from qualifying purchases.
View on AmazonAs an Amazon Associate, I earn from qualifying purchases.
Pro Tip: Use decorative brackets that complement your decor style to turn functional shelving into a design feature. I chose black iron brackets that pop against my white walls, creating an industrial-chic look.
2. Under-Bed Storage Drawers
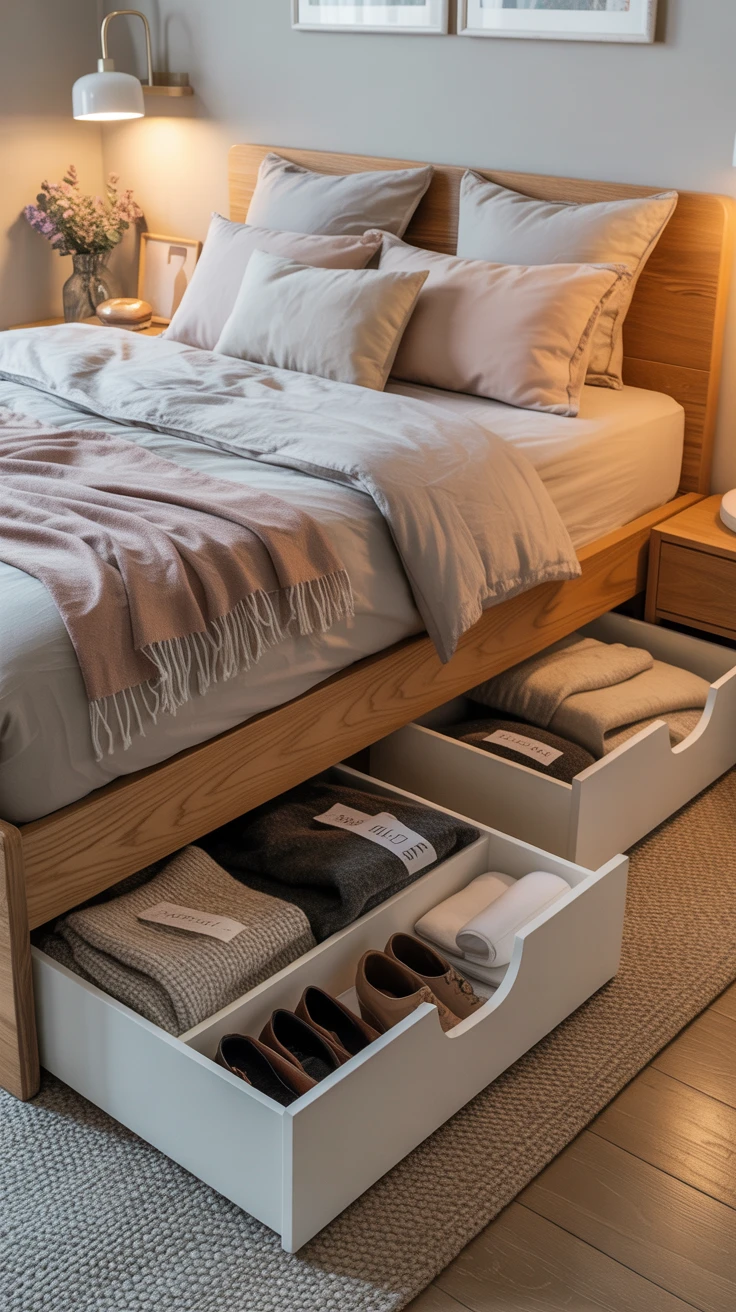
The space under your bed is prime real estate that often goes unused. I discovered this goldmine of storage after tripping over seasonal clothes piled in my closet one too many times.
Creating DIY under-bed storage drawers is surprisingly simple. I repurposed old dresser drawers by adding casters to the bottom for easy access. For a more polished look, you can build custom wooden drawers or use plastic containers with lids.
- Perfect for storing seasonal clothing
- Ideal for extra bedding and linens
- Great for rarely-used items like holiday decorations
- Keeps dust at bay while maximizing space
If you’re not up for building drawers from scratch, look for low-profile under-bed storage bins with wheels that slide in and out effortlessly.
Pro Tip: Label your under-bed drawers clearly or use clear containers to easily identify contents without having to pull everything out. I learned this lesson after spending 20 minutes searching through unlabeled boxes for my winter sweaters!
3. Over-the-Door Organizers
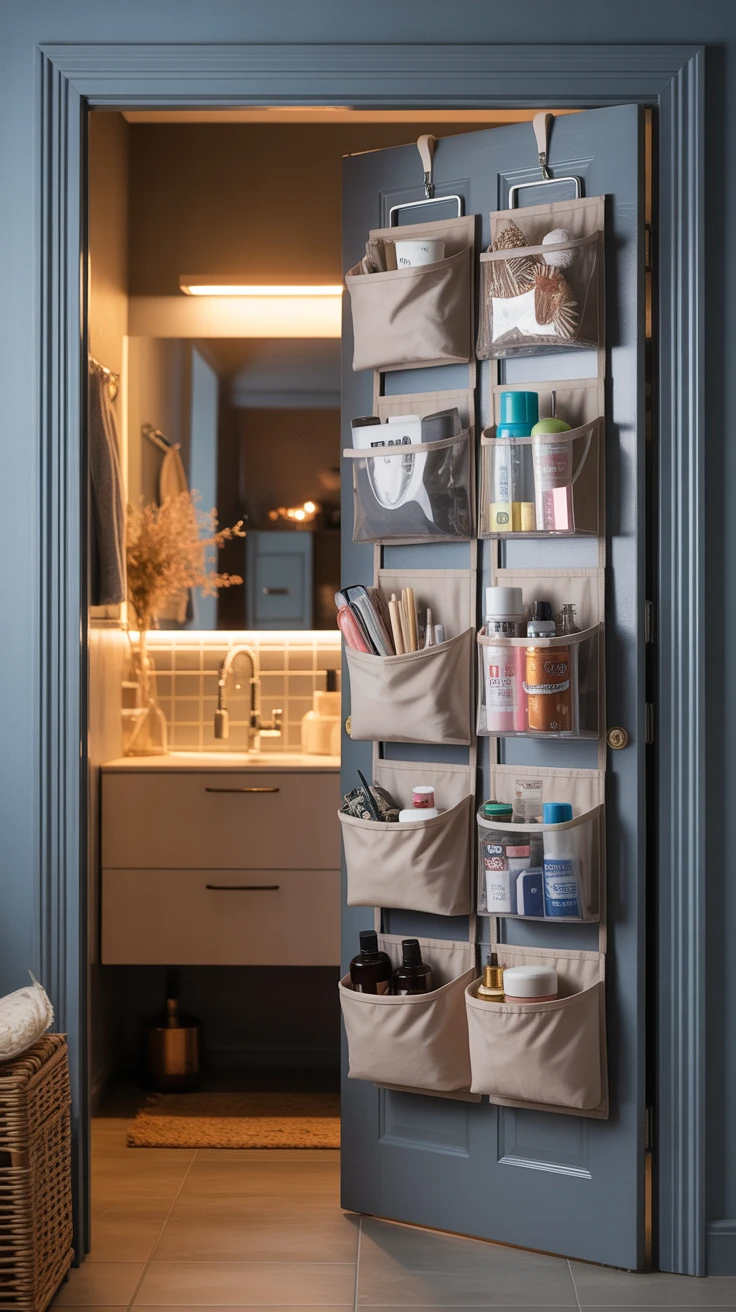
Doors are often overlooked storage opportunities. In my bathroom, an over-the-door organizer eliminated counter clutter and transformed my morning routine.
These versatile organizers come in various styles, from shoe pockets to hook systems. I’ve found that the pocket-style organizers work wonderfully for bathroom supplies, craft materials, and even pantry items. For my bedroom door, I installed a sturdy hook system that holds robes, bags, and tomorrow’s outfit.
The best part? No drilling required. Most over-the-door systems simply hang over the top of your door, making them perfect for renters like me who need to avoid permanent modifications. A simple over-the-door organizer can instantly give you extra “hidden” storage in any room.

View on AmazonAs an Amazon Associate, I earn from qualifying purchases.

View on AmazonAs an Amazon Associate, I earn from qualifying purchases.
Pro Tip: Choose an over-the-door organizer with adjustable heights to accommodate items of different sizes. This flexibility has allowed me to store everything from tall hairspray bottles to small cosmetic items.
4. Pegboard Wall Organizer
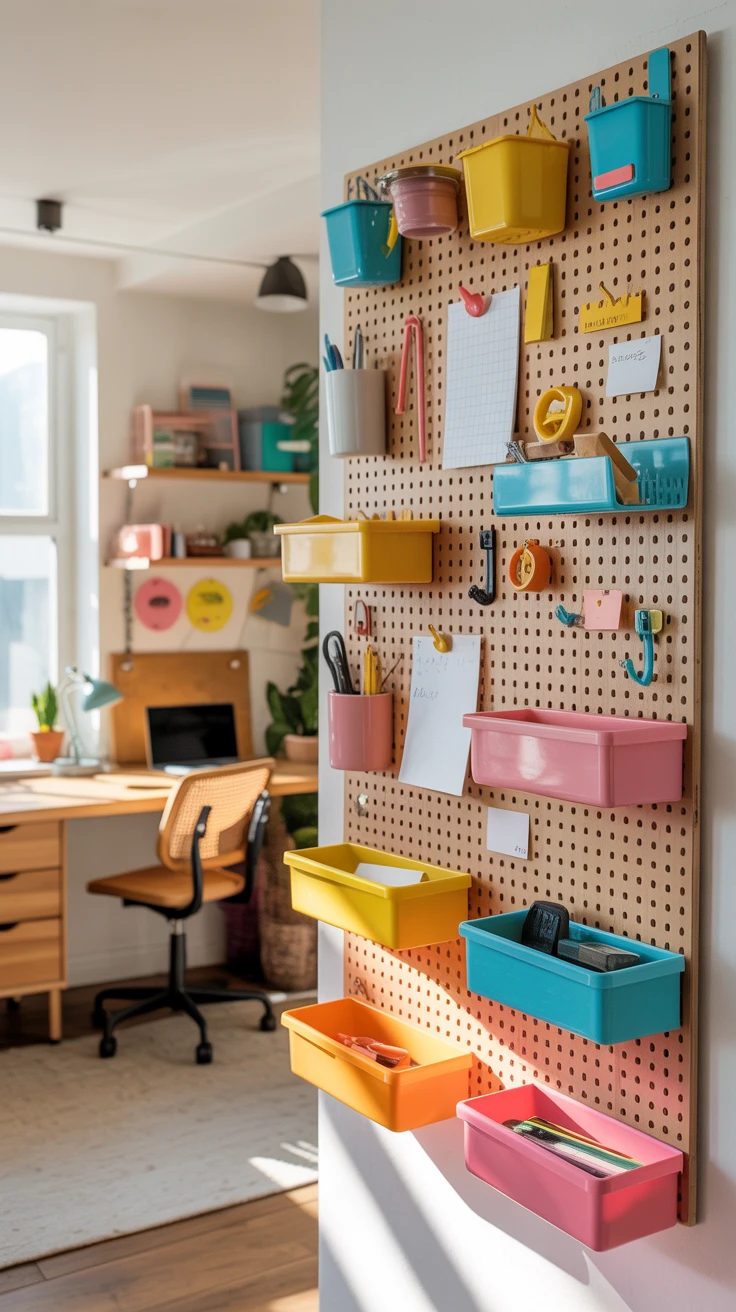
Pegboards have revolutionized my workspace organization. After struggling with desk clutter that constantly encroached on my working area, I installed a pegboard that keeps everything visible yet off my desk.
The beauty of pegboards lies in their flexibility. With various hooks, shelves, and containers that can be rearranged at will, your storage system can evolve as your needs change. I’ve used pegboards in my:
- Home office for supplies and notes
- Kitchen for utensils and small cookware
- Craft area for tools and materials
A 2×4 foot pegboard cost me about $20, plus another $15 for an assortment of hooks and accessories – a small price for the organizational transformation. You can recreate this look with a ready-made pegboard wall organizer kit and customize the layout to your space.
5. Hanging Pot Racks

My tiny kitchen with limited cabinet space forced me to get creative. A DIY hanging pot rack freed up an entire cabinet while adding a professional chef’s kitchen vibe to my space.
You can create a simple pot rack using a wooden ladder, metal pipes, or even repurposed pallets. I opted for a ceiling-mounted rack using iron pipes for an industrial look that complements my kitchen aesthetic.
Beyond pots and pans, these racks can hold colanders, measuring cups, and other bulky kitchen tools that eat up drawer space. If DIY isn’t your thing, a ceiling-mounted hanging pot rack can give you the same effect with just a few anchors and screws.

View on AmazonAs an Amazon Associate, I earn from qualifying purchases.

View on AmazonAs an Amazon Associate, I earn from qualifying purchases.
Pro Tip: Install your pot rack above a kitchen island or peninsula rather than directly over the stove. This prevents grease buildup on your cookware and makes them easier to access while cooking. I learned this the hard way after having to rewash greasy pots several times!
6. Fold-Down Wall Desk
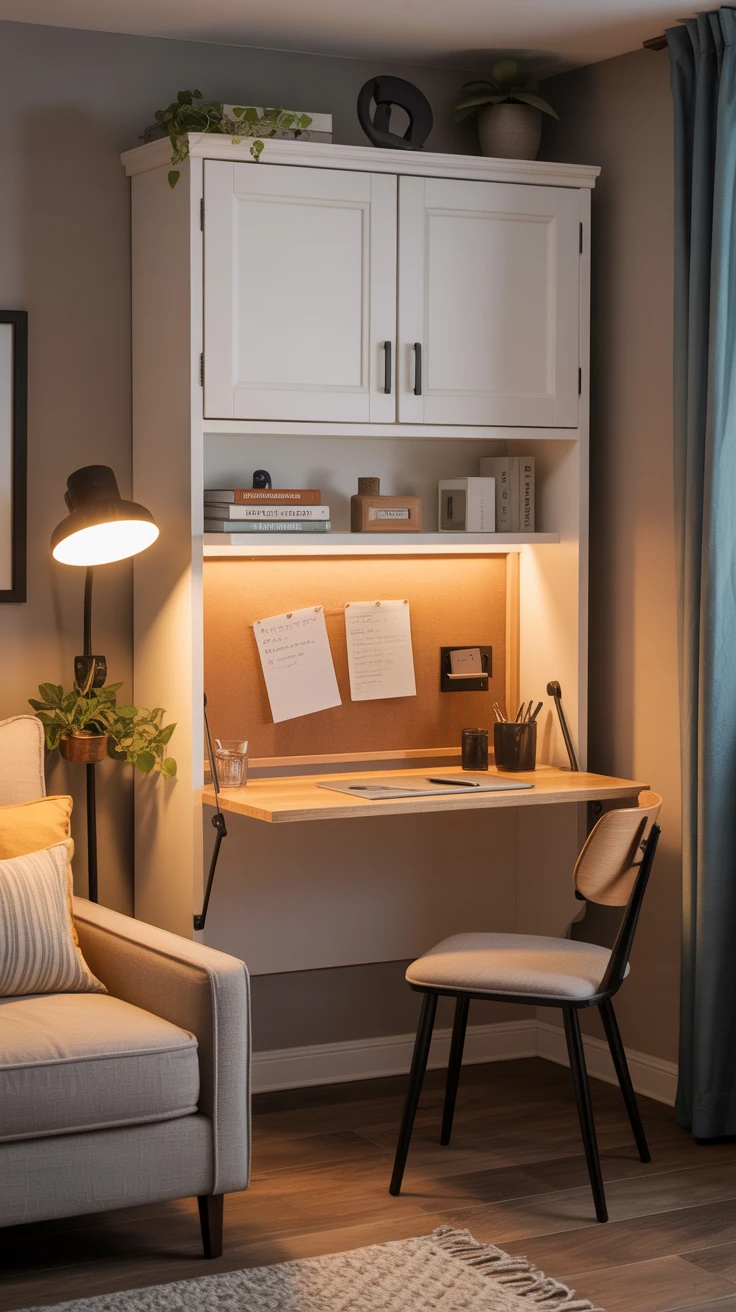
Working from home in a small apartment presented a significant challenge until I built a fold-down wall desk. This space-saving solution provides a full workspace when needed and disappears when not in use.
My DIY version used a wall-mounted drop-leaf table mechanism with a repurposed cabinet door as the desktop. When folded down, it reveals a corkboard for notes and small shelves for office supplies. When folded up, it takes up just 4 inches of wall space.
This project required some careful measuring and basic carpentry skills, but the results have been worth every effort. I now have a dedicated workspace without sacrificing my living area.
Pro Tip: Add a small LED light strip to the underside of your fold-down desk to illuminate the workspace without needing additional floor or desk lamps.
7. Staircase Storage Solutions
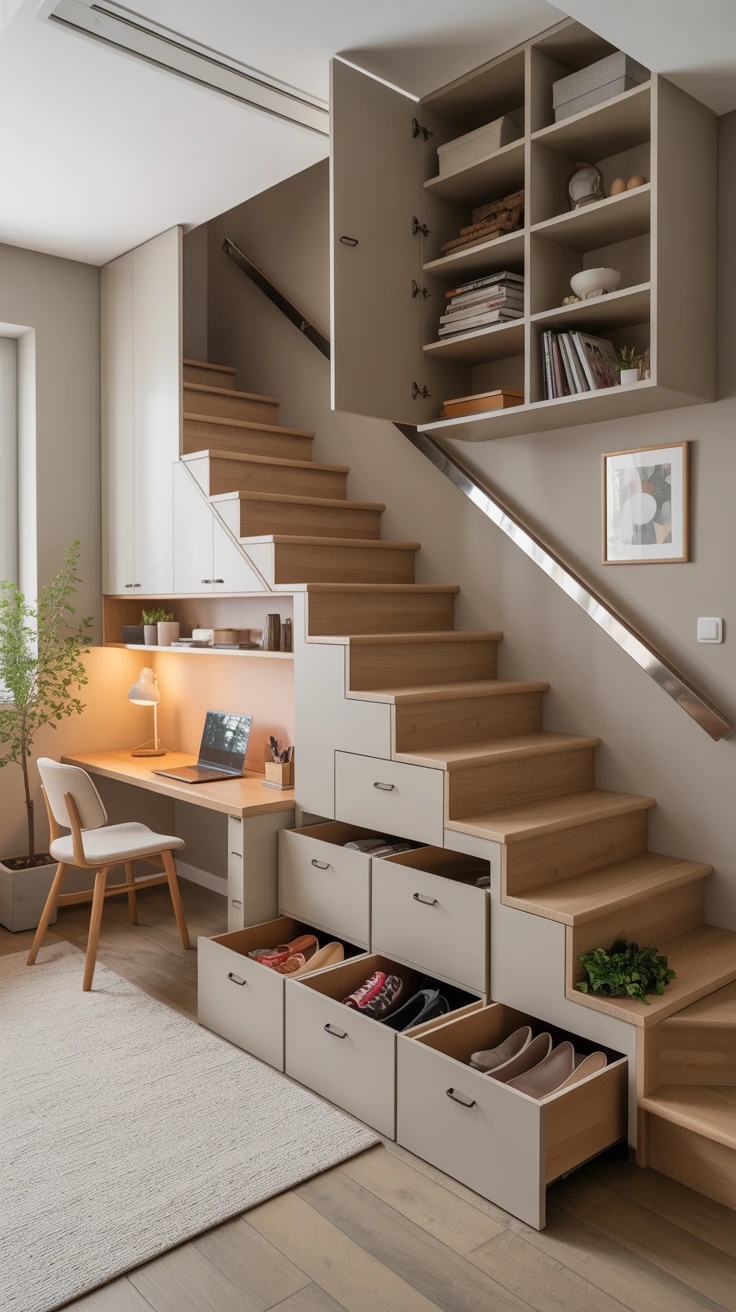
For those lucky enough to have stairs in their small homes, the space beneath them offers exceptional storage potential. In my duplex apartment, I transformed the awkward area under the stairs from a dust-collecting void to functional storage.
Depending on your staircase configuration, you might consider:
- Pull-out drawers built into the risers
- Cabinet doors accessing the hollow space underneath
- Open shelving for books and display items
- A mini office nook with a built-in desk
My solution involved installing a series of differently sized drawers that pull out from the side, perfect for storing everything from shoes to holiday decorations.
8. DIY Closet Organizers

My standard-issue closet with a single rod and shelf wasn’t cutting it for my clothing storage needs. Rather than investing in expensive closet systems, I created a DIY space saving storage solution that doubled my usable space.
Using inexpensive materials from the hardware store, I built:
- A double-rod hanging system
- Custom-sized shelves for folded items
- Shoe organizers along the bottom
- Hook systems for belts, scarves, and accessories
Pro Tip: Use adjustable shelving systems rather than fixed shelves to allow your closet organization to evolve with your changing storage needs. I use tension rods and adjustable brackets that can be reconfigured seasonally.
9. Bathroom Storage Hacks
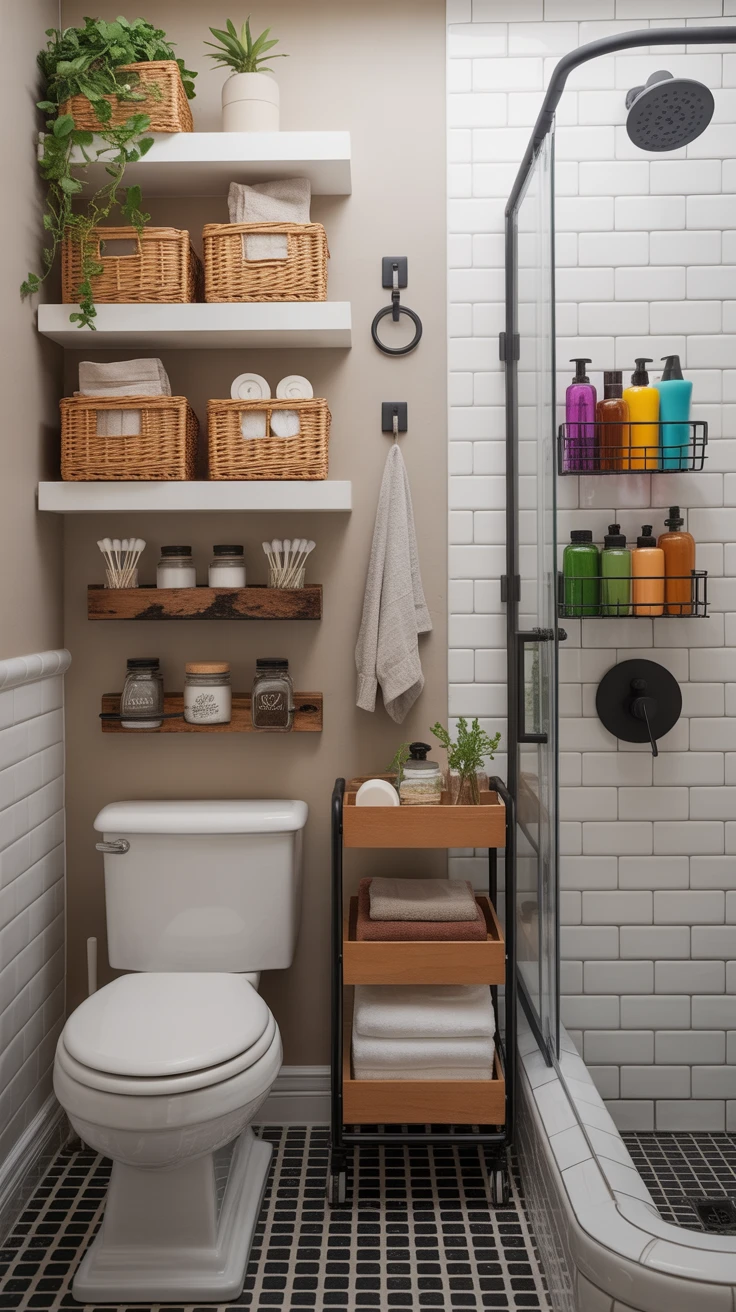
Small bathrooms present unique storage challenges. My bathroom lacked both counter space and storage, leading to constant clutter and frustration until I implemented these solutions:
- Magnetic strips for metal grooming tools like tweezers and nail clippers
- Narrow rolling cart that fits between the toilet and wall
- Shower caddy hanging from the showerhead
- Mason jars mounted on wood for toothbrushes and cotton swabs
My favorite hack was installing floating shelves above the toilet, which provided storage without sacrificing floor space. I staggered the shelves at different heights to accommodate items of various sizes. A slim rolling bathroom cart is also perfect for tucking into tight gaps and keeping your essentials organized.
Pro Tip: Use decorative baskets on bathroom shelves to hide unsightly toiletries while maintaining easy access. This keeps your bathroom looking tidy even with open shelving.
10. Multipurpose Furniture
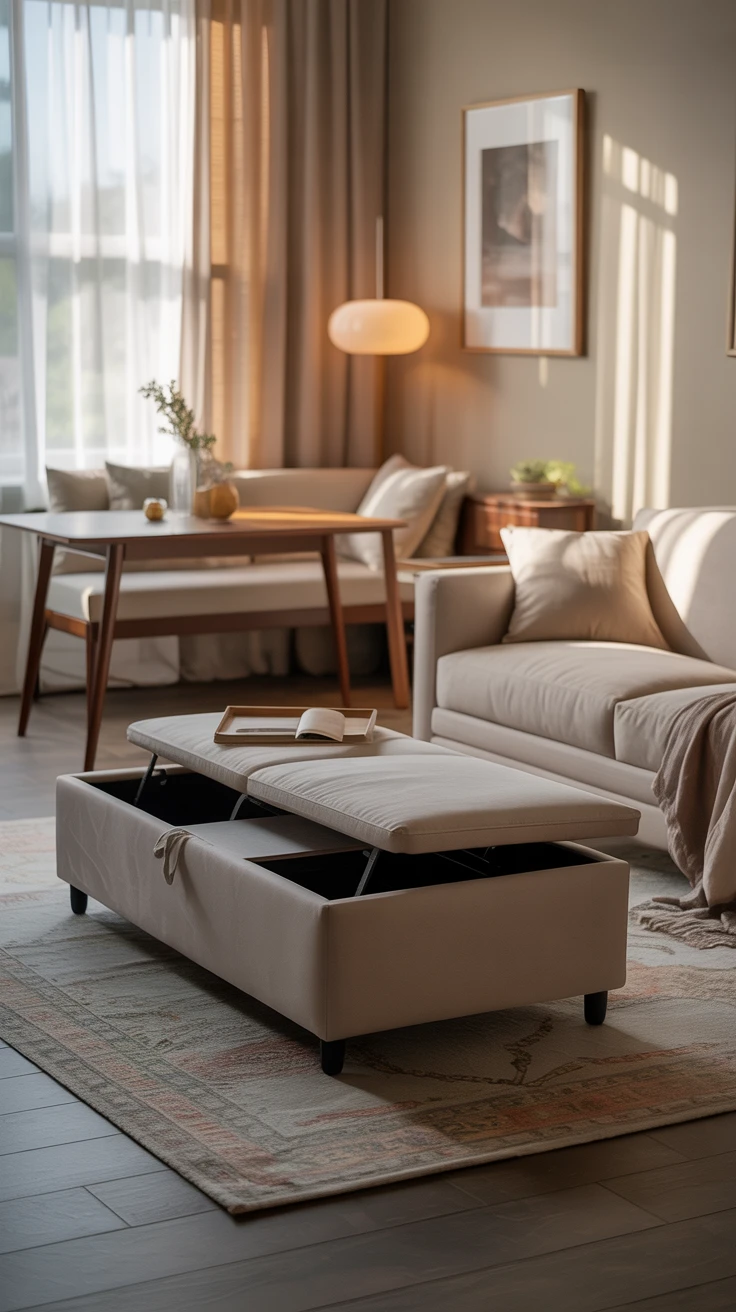
In small spaces, every piece of furniture should earn its keep. I’ve become a firm believer in multipurpose furniture after replacing my standard coffee table with a storage ottoman that serves as seating, storage, and a surface for drinks or meals.
Other multifunctional furniture pieces that have transformed my small home include:
- Sofa bed for overnight guests
- Dining table with drop leaves that expands only when needed
- Nesting tables that can be separated for entertaining
- Bench with hidden storage for shoes and bags
Look for a sturdy storage ottoman bench that matches your decor—it’s one of the easiest ways to add hidden storage and extra seating at the same time.
Pro Tip: When shopping for furniture, always ask yourself, “What else could this do?” The best small-space furniture solves at least two problems at once.
11. Pallet Wood Creations
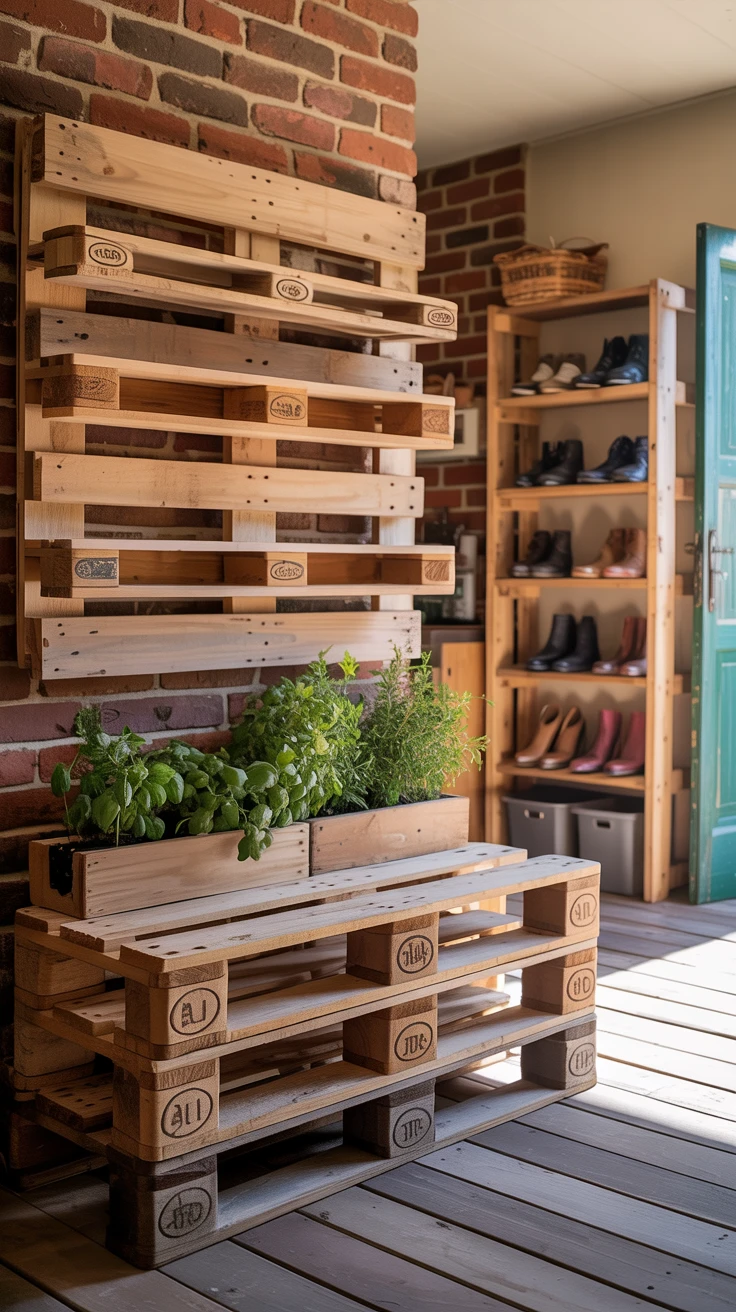
Wooden pallets have become my go-to material for budget-friendly DIY space saving storage ideas. After scoring free pallets from a local garden center, I’ve created several storage solutions that add rustic charm to my home.
My favorite pallet projects include:
- Wall-mounted wine rack
- Vertical herb garden for my kitchen
- Shoe organizer for my entryway
- Bookshelf with integrated storage bins
The natural variation in pallet wood creates unique pieces that add character while solving storage problems. Just be sure to sand thoroughly to avoid splinters!
Pro Tip: Look for pallets marked with “HT” (heat-treated) rather than “MB” (methyl bromide) to ensure they’re safe for indoor use. I always clean my pallets thoroughly and seal them with food-safe finishes for kitchen projects.
12. Hidden Storage Compartments
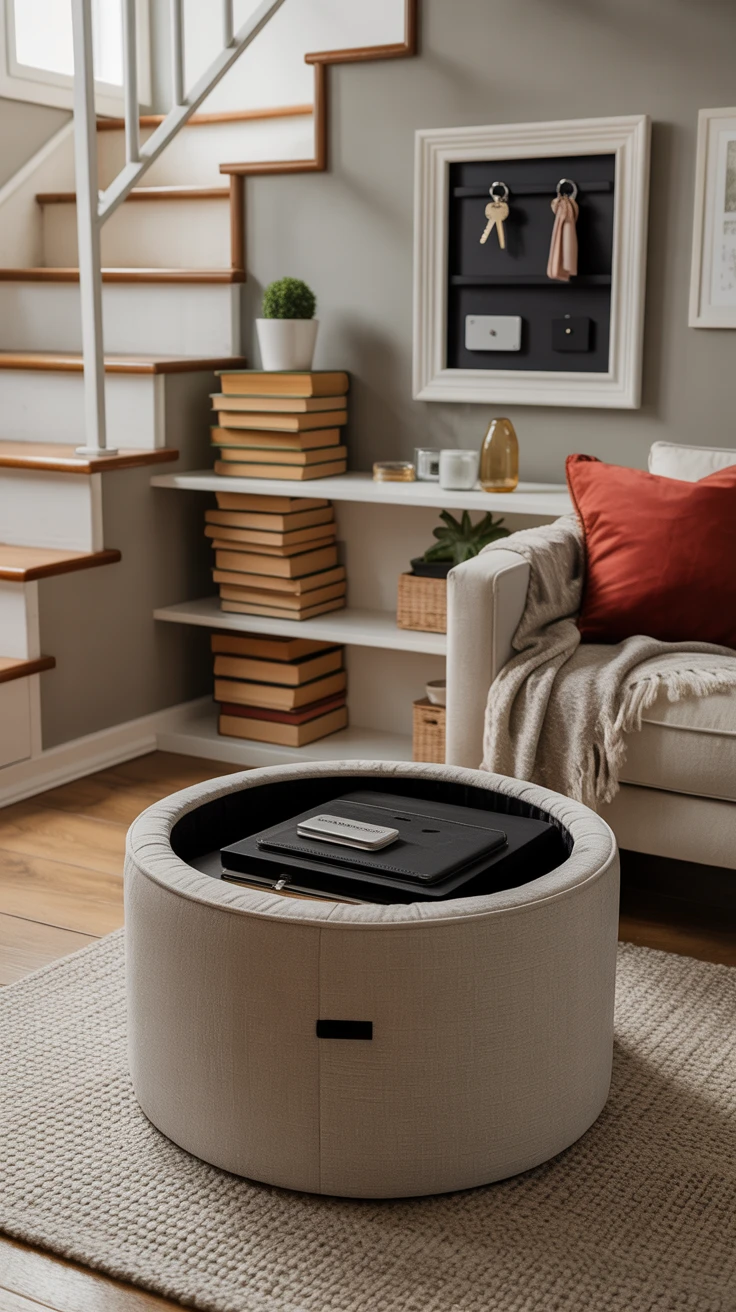
There’s something satisfying about secret storage that hides in plain sight. In my quest for a clutter-free home, I’ve created several hidden storage solutions that keep essentials accessible but invisible.
My most successful hidden storage projects include:
- Ottoman with a false bottom for valuables
- Hollow book storage for small electronics
- Picture frames with hinged fronts for hiding keys and small valuables
- Stair treads that lift to reveal storage compartments
Pro Tip: Create a map of your hidden storage locations to avoid forgetting where you’ve stashed important items. I learned this lesson after spending hours searching for documents I’d cleverly hidden months earlier!
13. Window Seat Storage
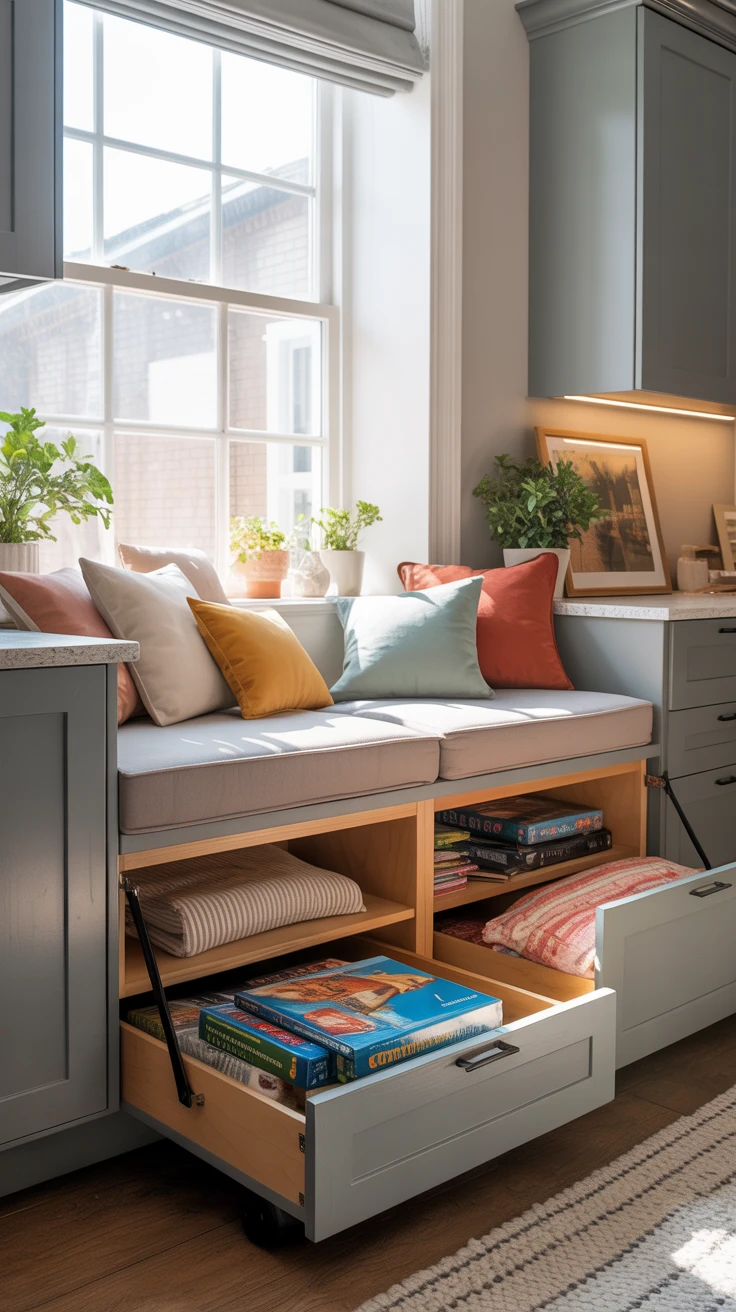
The window seat I built not only created a cozy reading nook but also added substantial storage capacity to my living room. With a hinged top and deep storage compartment, it houses everything from extra blankets to board games.
Building a basic window seat requires intermediate DIY skills, but the results are well worth the effort. I constructed mine using stock kitchen cabinets as the base, topped with a cushioned lid on piano hinges.
For those with limited carpentry skills, you can achieve a similar effect by placing a storage bench under a window and adding cushions and pillows.
Pro Tip: Install slow-close hinges on your window seat lid to prevent pinched fingers and damage to the wood. This small upgrade has saved my fingers numerous times!
Embrace Creative Storage Solutions
Throughout my small-space living journey, I’ve learned that creative DIY space saving storage ideas can transform even the tiniest homes into organized, functional spaces. The key is to look at every unused inch as an opportunity.
Start with one project that addresses your most pressing storage need, then build from there. You’ll be surprised how each solution creates a ripple effect, freeing up space elsewhere and inspiring new ideas.
Remember that the best storage solutions are the ones that work with your lifestyle. I’ve abandoned perfectly good storage systems that required too much maintenance or disrupted my natural habits. The goal is organization that makes your life easier, not more complicated.
With these 13 ideas as your starting point, you’re well on your way to a more organized, spacious-feeling home – no matter its actual square footage.
Frequently Asked Questions
What are some cost-effective DIY storage solutions for beginners?
For beginners, I recommend starting with over-the-door organizers, under-bed storage containers, or floating shelves. These projects require minimal tools and expertise while providing significant storage benefits. Repurposing items you already own, like using mason jars for bathroom storage or installing hooks inside cabinet doors, costs almost nothing and can be completed in minutes.
How can I make DIY storage look aesthetically pleasing?
The key to attractive DIY storage is consistency in materials and finishes. Choose hardware (like hooks, brackets, and handles) in the same finish throughout a room. Use decorative baskets or fabric bins in coordinating colors to hide utilitarian items. Consider painting or staining wooden storage pieces to match your existing decor. In my experience, even simple storage solutions look intentional and designed when they coordinate with your overall aesthetic.
What tools do I need for basic DIY storage projects?
A basic DIY toolkit for storage projects should include a drill with various bits, a stud finder, level, tape measure, screwdriver set, and hammer. For more advanced projects, you might need a circular saw, miter box, or jigsaw. I started with just the basics and gradually added tools as my skills and project ambitions grew. If you’re building your toolkit from scratch, a compact home tool set can be an affordable way to get all the essentials in one go.
Are there any safety tips for installing DIY storage?
Always use appropriate wall anchors for the weight of your items and the type of wall (drywall, plaster, concrete). For heavy shelving, mount into wall studs whenever possible. Keep step ladders fully open and stable when working at heights. I once had a floating shelf collapse because I used inadequate anchors – lesson learned! When working with power tools, wear safety glasses and follow all manufacturer instructions.
How do I maximize storage in extremely small spaces like studio apartments?
In extremely small spaces, think vertically and utilize multi-function solutions. Use full-height bookcases that reach to the ceiling. Choose furniture with built-in storage like platform beds with drawers. Consider room dividers that double as storage units. Look for “dead spaces” like the area above door frames for high shelving. In my studio apartment days, I even stored seasonal items in vacuum-sealed bags inside suitcases that were stored under my bed – storage within storage!
