Introduction
When living in a tiny home, every square inch counts. As someone who’s navigated the challenges of small-space living for years, I’ve learned that vertical storage is your best friend. DIY storage shelves aren’t just budget-friendly alternatives to expensive furniture—they’re customizable solutions that can transform awkward nooks into functional spaces. Throughout my journey of maximizing my 400-square-foot apartment, I’ve experimented with countless shelf designs, making plenty of mistakes along the way (like the time I installed floating shelves without finding the studs—disaster!). Today, I’m sharing 14 innovative shelf ideas that have genuinely changed how I live in my small space. Whether you’re a seasoned woodworker or a DIY novice, these projects offer practical solutions to your storage woes while adding personality to your tiny home.
1. Wall-Mounted Wonders
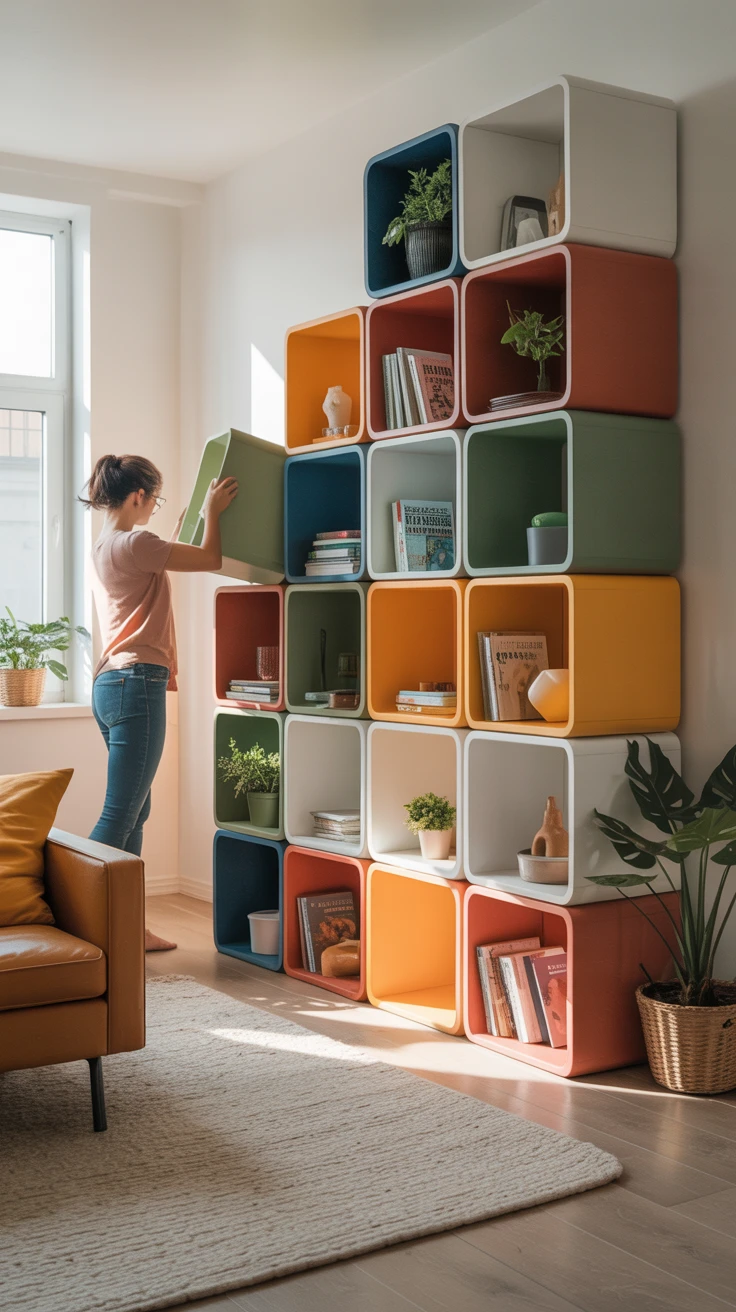
Wall-mounted shelves are the cornerstone of tiny home storage. I remember my first apartment where floor space was so limited that I couldn’t fit a bookcase anywhere. Wall-mounted shelves saved me! These shelves keep your belongings off the floor while creating visual interest on otherwise empty walls.
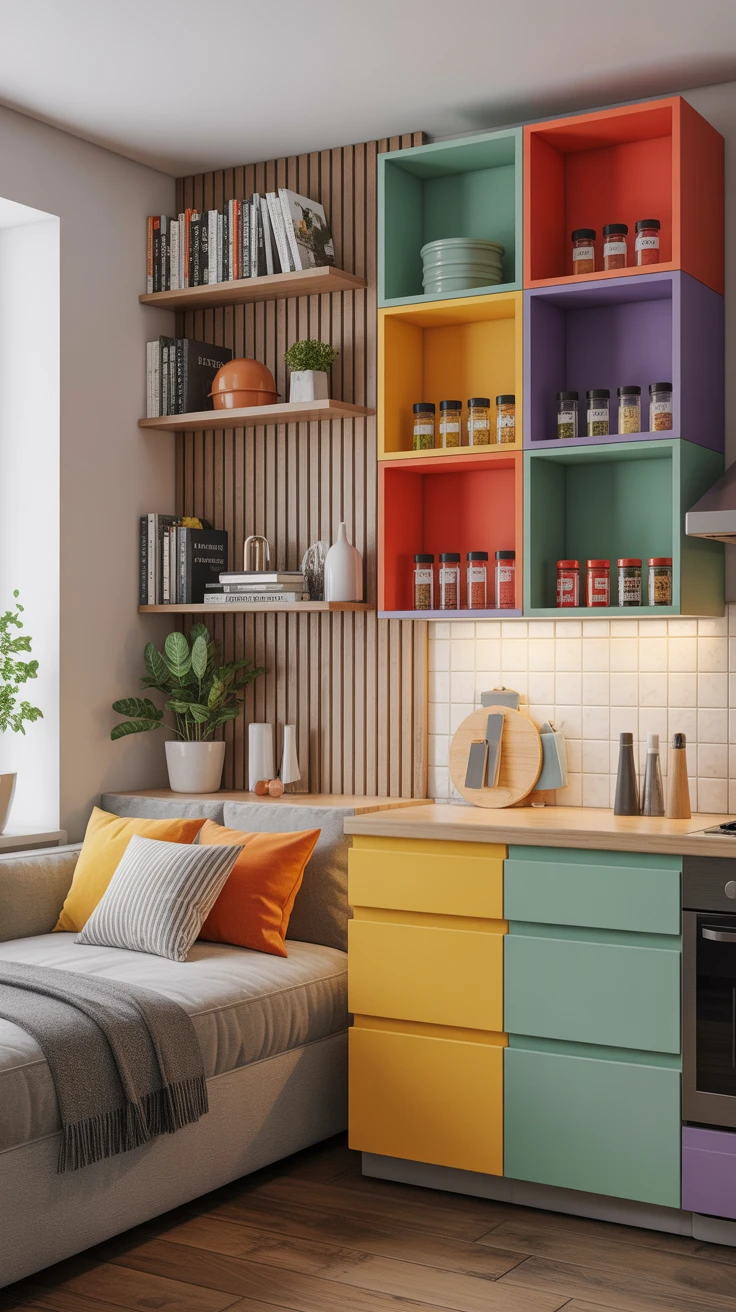
Simple cube shelves are my go-to for versatility. They can be arranged in countless configurations to suit your space and storage needs. For my kitchen, I installed a series of staggered cube shelves that created an artistic display for my spice collection while keeping everything within arm’s reach.
- Box shelves: Create depth and visual interest with varying sizes
- Picture ledges: Perfect for displaying books, art, and small decorative items
- Vertical slat shelves: Ideal for narrow walls between windows or doors
Pro Tip: When installing wall-mounted shelves, always locate the wall studs first. I learned this lesson the hard way when my fully-loaded shelf collapsed, sending my favorite mug collection to an early grave. A stud finder is worth the investment!
2. Corner Space Savers
Corners are often the most underutilized spaces in tiny homes. I used to have empty corners throughout my apartment until I realized they were prime real estate for storage. Corner shelves can transform these awkward spaces into functional storage zones.
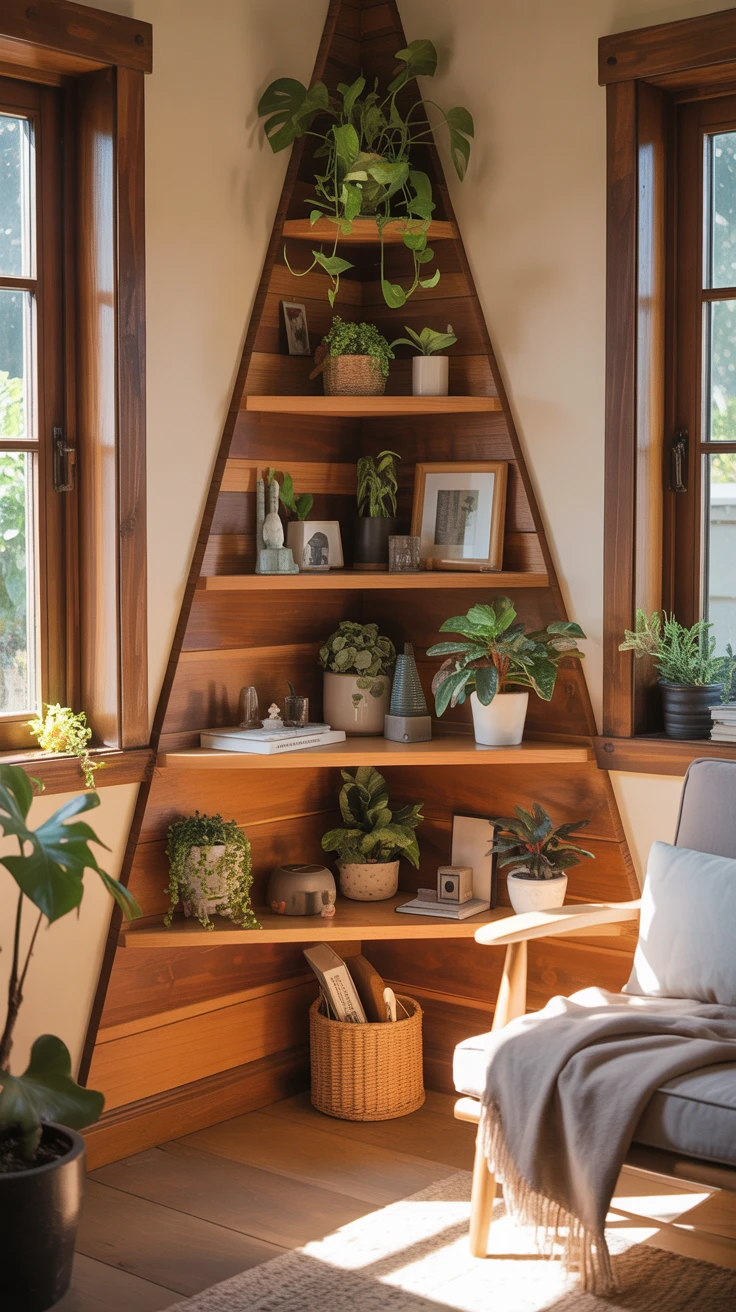
My favorite corner shelf project involved creating a five-tier triangular unit using just a single 1×8 board cut into progressively smaller triangles. The result was a beautiful display area for my plants that took advantage of natural light from nearby windows while using space that would otherwise be wasted.
L-shaped corner shelves offer even more storage capacity and can wrap around room corners to create continuous storage along two walls. I’ve found these particularly useful in my home office, where they provide ample space for reference books and supplies without consuming valuable desk space.
3. Floating Shelf Solutions
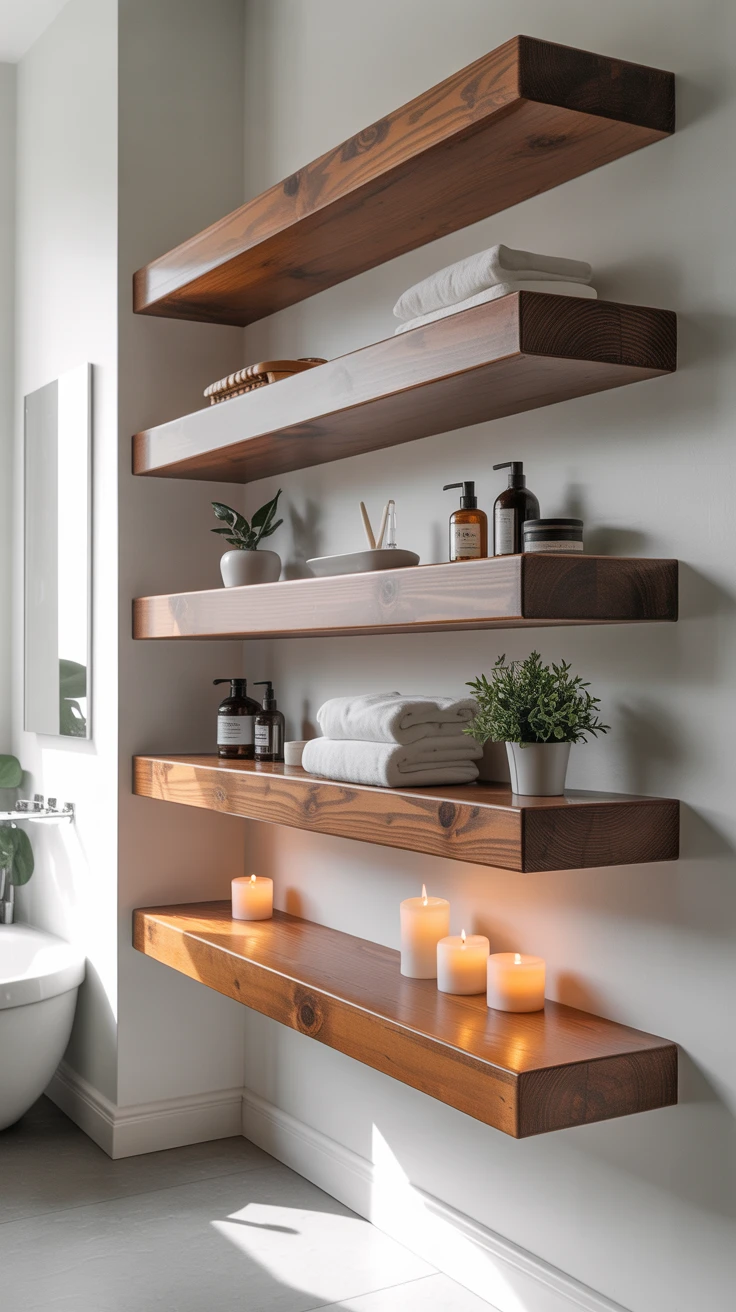
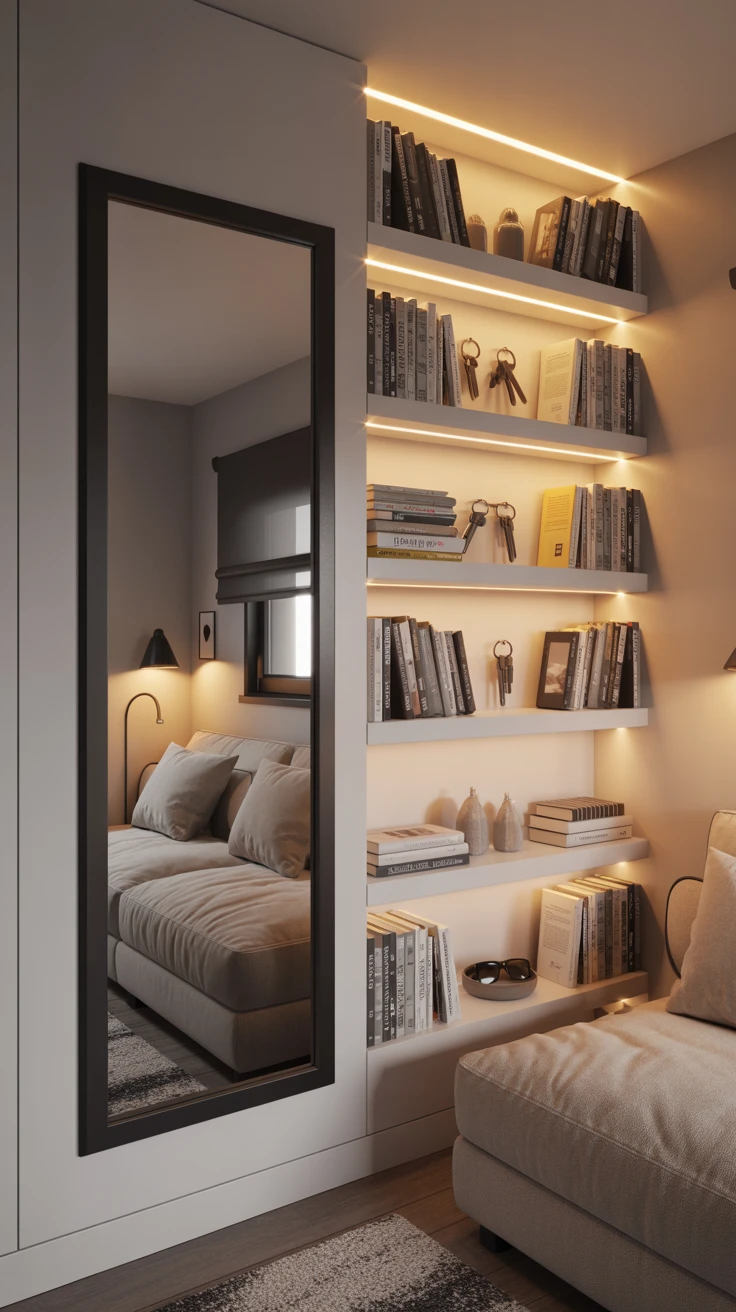
There’s something magical about floating shelves—they create storage space while maintaining an open, airy feel that’s crucial in small homes. After living with bulky bookshelves that made my living room feel cramped, I switched to floating shelves and was amazed at how much larger the space felt.
For my bathroom, I created simple floating shelves using 2×8 pine boards and hidden bracket mounts. The clean lines complemented my minimal aesthetic while providing necessary storage for toiletries. In my entryway, a single floating shelf serves as a catch-all for keys, mail, and other items that would otherwise clutter surfaces.
Pro Tip: For heavier items, use floating shelf brackets that mount directly to wall studs. For lighter displays, toggle bolts can provide sufficient support when studs aren’t available.
4. Under-the-Stairs Shelving

If your tiny home has stairs, you’re sitting on a gold mine of storage potential. The space under stairs is often awkwardly shaped, but with custom shelving, it can become one of your most functional storage areas.
In my duplex with a narrow staircase, I created a series of graduated shelves that followed the stair line perfectly. The deeper shelves at the bottom held my record collection, while the shallower upper shelves displayed books and small decorative items. What was once dead space became a focal point of my living room.
For those with enclosed stair spaces, consider installing drawer units on rails that pull out from under each step. I helped a friend implement this solution, and she gained storage for everything from seasonal decorations to rarely-used kitchen appliances—all completely hidden from view.
5. Multi-functional Shelves
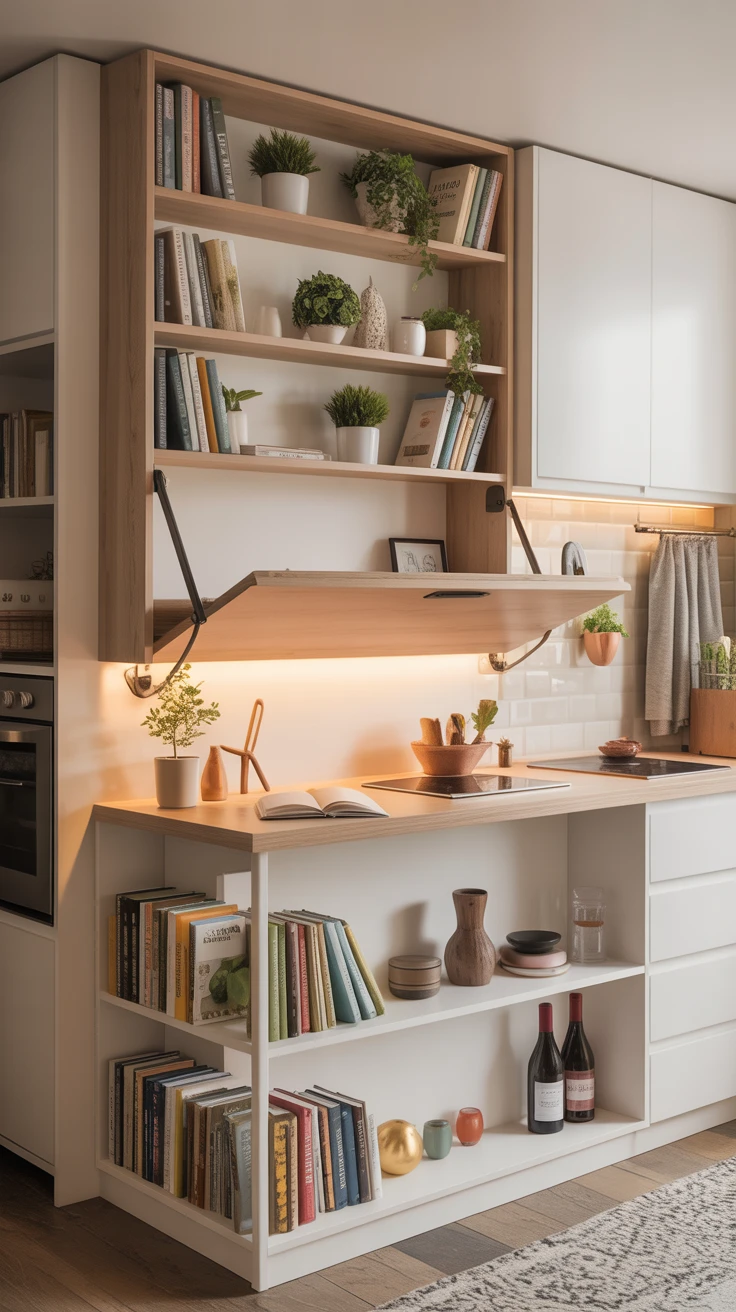
In tiny homes, furniture that serves multiple purposes is invaluable. I’ve become obsessed with creating shelving units that do double-duty as other functional pieces.
My proudest creation is a wall-mounted desk that folds up to reveal shelving when not in use. During the day, it’s my workspace, but in the evening, it transforms back into a bookshelf, freeing up floor space for yoga or entertaining guests.
Another favorite is my kitchen island with built-in shelving on the sides. What appears to be a simple food prep surface actually houses my cookbook collection, rarely-used appliances, and even wine storage. When space is at a premium, these multi-functional solutions make all the difference.
6. Reclaimed Wood and Rustic Styles
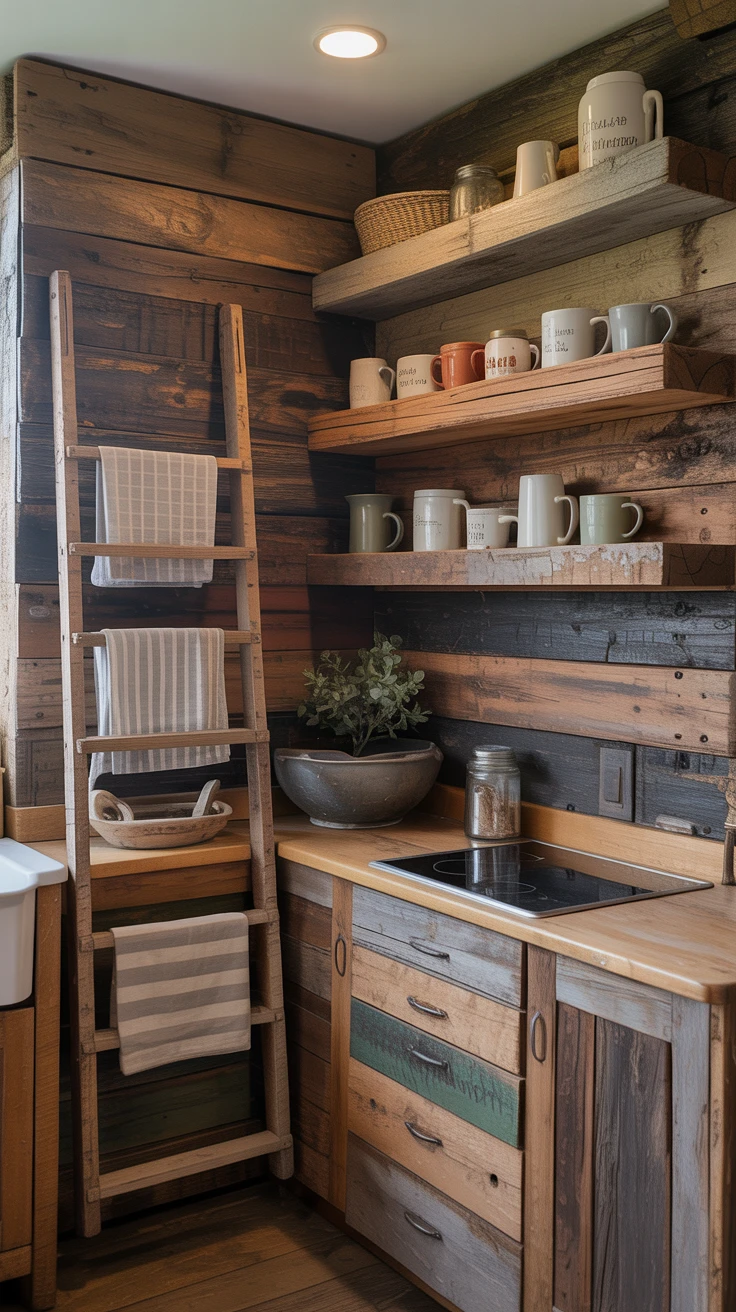
DIY storage shelves made from reclaimed wood add character while being environmentally friendly. I’ve become somewhat of a scavenger, collecting discarded pallets, old fence boards, and even salvaged barn wood for my shelving projects.
My kitchen shelves, made from 100-year-old barn wood, tell a story that new materials simply can’t match. The weathered texture and varied coloration add warmth to my small space while providing open storage for frequently used items.
For my bathroom, I repurposed an old wooden ladder, cutting it in half vertically and mounting it to the wall to create rustic shelving for towels and toiletries. The project cost me nothing but a few hours of time and has become one of the most commented-on features of my home.
Pro Tip: Always clean and treat reclaimed wood before bringing it indoors. I once skipped this step and ended up with a minor beetle infestation! A solution of borax and water will eliminate most pests, followed by a clear sealer to prevent splinters.
7. Pipe Dreams
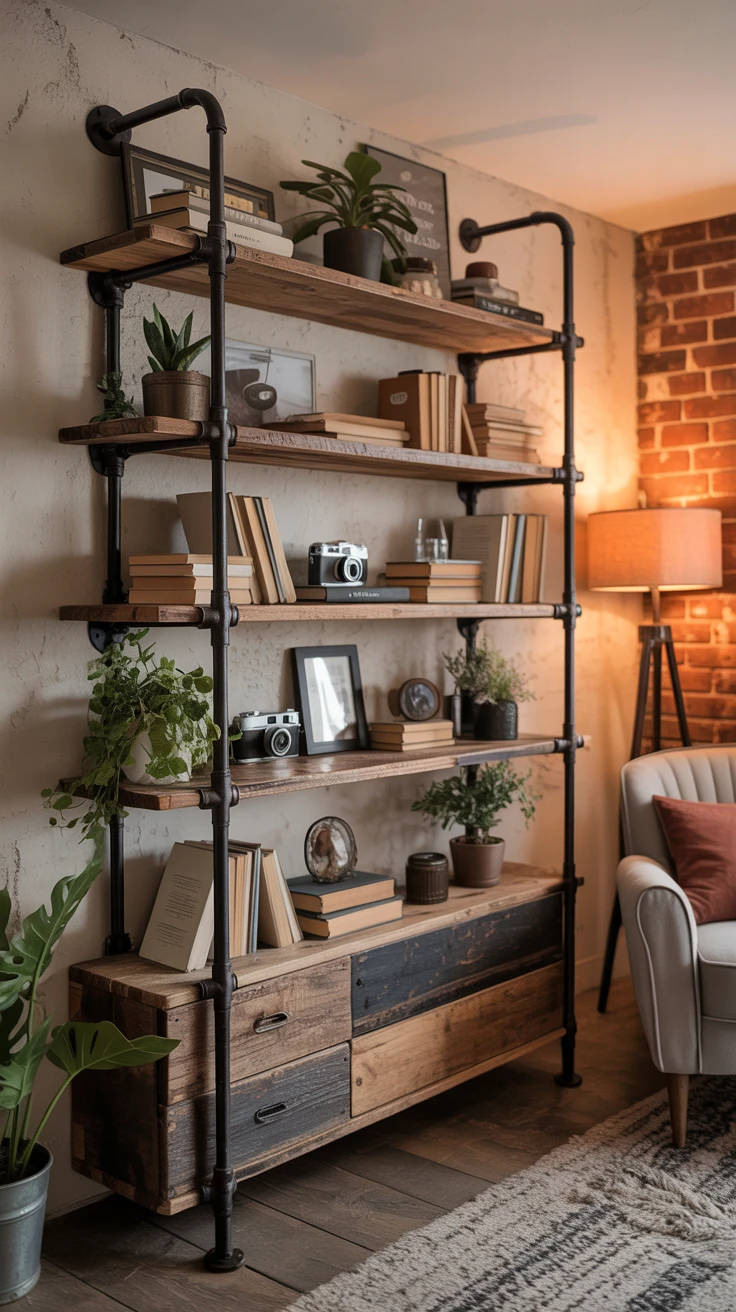
Industrial pipe shelving offers incredible strength and a distinctive aesthetic. After a shelf collapse in my pantry (another lesson in proper mounting!), I rebuilt using iron pipes and flanges combined with wooden boards. The result was not only more stable but became a design feature in its own right.
For my living room, I created a full wall unit using black iron pipes and reclaimed wood. The adjustable nature of threaded pipes meant I could create a completely custom configuration that fit my space perfectly.
- Materials needed:
- Iron pipes (various lengths)
- Pipe flanges (for wall or floor mounting)
- Pipe elbows and T-joints
- Wooden boards (cut to desired shelf length)
- Wood stain or paint
- Screws for mounting flanges
8. Modular Stackables
The beauty of modular shelving is its adaptability. As someone who has moved three times in five years, I’ve come to appreciate furniture that can change with my living situation.
I built a set of identical cube modules that can be stacked and arranged in countless configurations. In my current space, they’re arranged in a staggered pattern along one wall, but in my previous apartment, they served as room dividers in a studio layout.
The key to successful modular shelving is consistency in dimensions. I created a simple jig to ensure all my boxes were exactly the same size, allowing them to stack securely. Each module cost less than $15 in materials, making this an affordable solution that can grow with your needs.
9. Pegboard Perfection
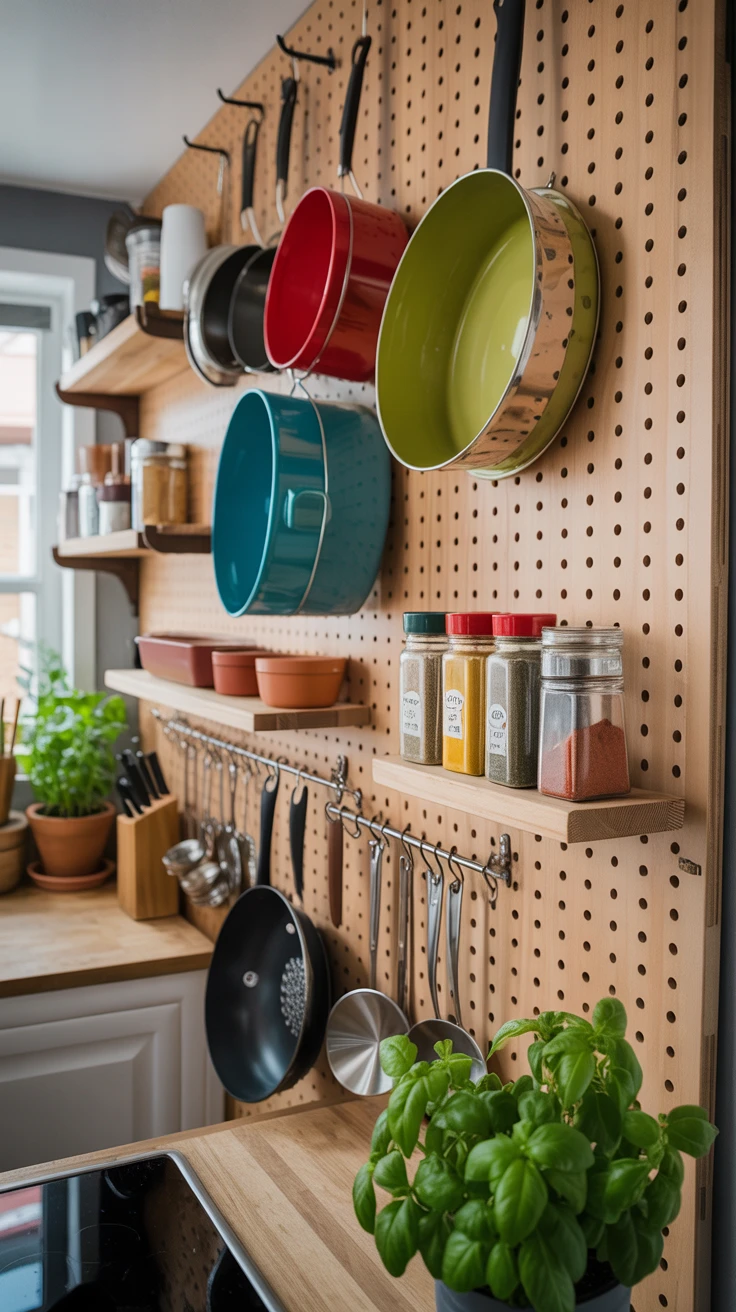
Pegboards aren’t just for garages anymore. After struggling with limited kitchen counter space, I installed a pegboard wall that revolutionized my cooking experience. Pots, pans, utensils, and even small shelves hang from the board, keeping everything visible and accessible while freeing up valuable cabinet space.
In my craft area, a pegboard system with movable shelves allows me to reconfigure my storage based on current projects. When I was deep into a knitting phase, the shelves held yarn and needles; now that I’m exploring painting, they display brushes and paints.
The flexibility of pegboard systems makes them ideal for tiny homes where needs change frequently. I frame my pegboards with simple wooden molding to elevate them from utilitarian to decorative elements.
10. Ladder Leaning Shelves

Leaning ladder shelves offer substantial storage without requiring permanent installation—perfect for renters like me who can’t make major modifications. My first ladder shelf was an actual wooden ladder that I sanded, painted, and leaned against the wall with wooden planks creating the shelves.
Later, I built a more refined version with tapering shelf depths—wider at the bottom for books and narrower at the top for decorative items. The angled design takes up minimal floor space while providing significant storage capacity.
What I love most about ladder shelves is their mobility. When I rearrange my space (a frequent hobby in tiny home living), I can simply pick up the entire unit and move it to a new location without dealing with wall repairs.
11. Hidden Bookshelves
Sometimes the best storage solutions are the ones you don’t see. I’ve become somewhat obsessed with creating hidden storage that maintains the clean, minimalist aesthetic I prefer in small spaces.
My favorite hidden shelf project involved creating “floating” bookshelves using inexpensive L-brackets and book jackets. By removing the cover from an old hardback book and attaching it to a hidden bracket, then stacking regular books on top, I created the illusion of books magically stacked on the wall.
Another hidden solution was installing shallow shelving behind a wall-mounted mirror in my entryway. The mirror swings open to reveal storage for keys, sunglasses, and other small items that would otherwise clutter surfaces.
12. Window Frame Shelves
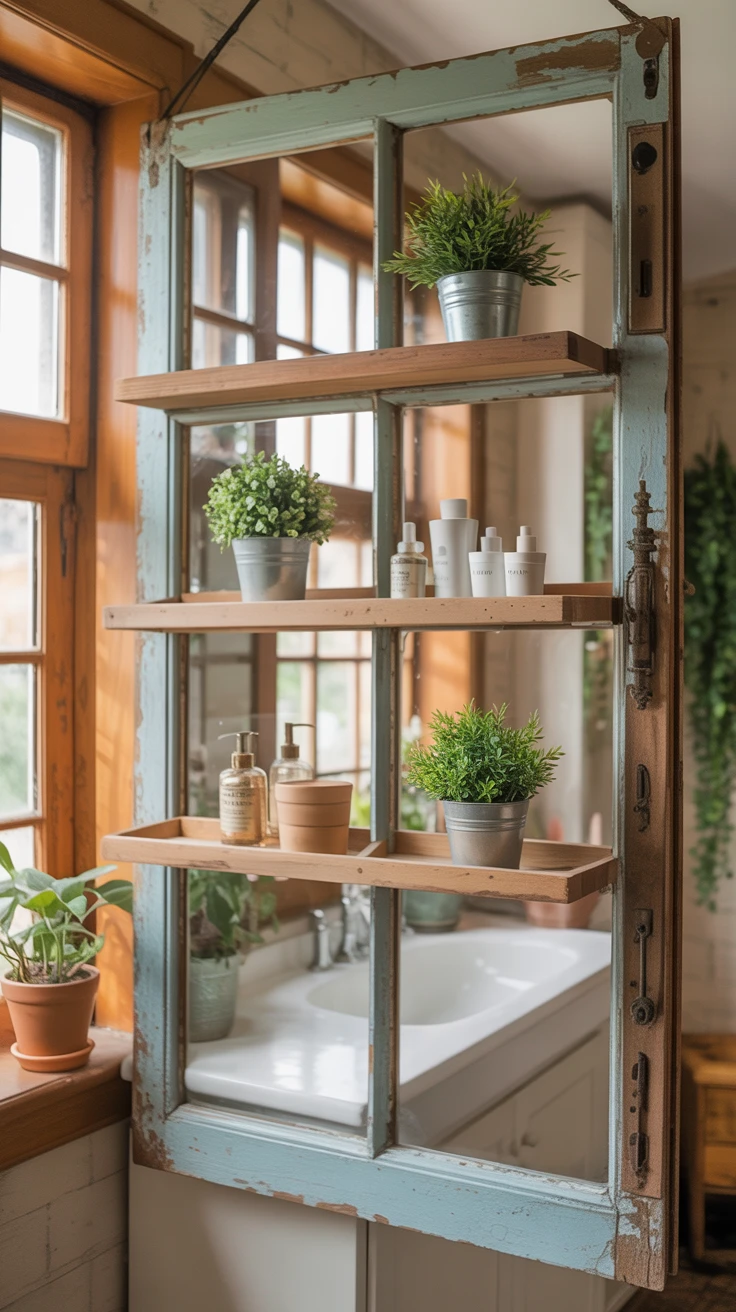
Old window frames make charming and unique shelving units. After finding a discarded six-pane window frame, I cleaned it thoroughly, attached a back and shelves, and created a shadow-box style display for my collection of small mementos.
For a more practical storage solution, I mounted a window frame horizontally, added shelves where the glass would be, and created a bathroom storage unit that added architectural interest while keeping toiletries organized.
The character of old windows—with their weathered paint and unique hardware—adds a decorative element that elevates these shelves beyond mere storage to become artistic focal points in a small space.
13. Shoebox Shelving
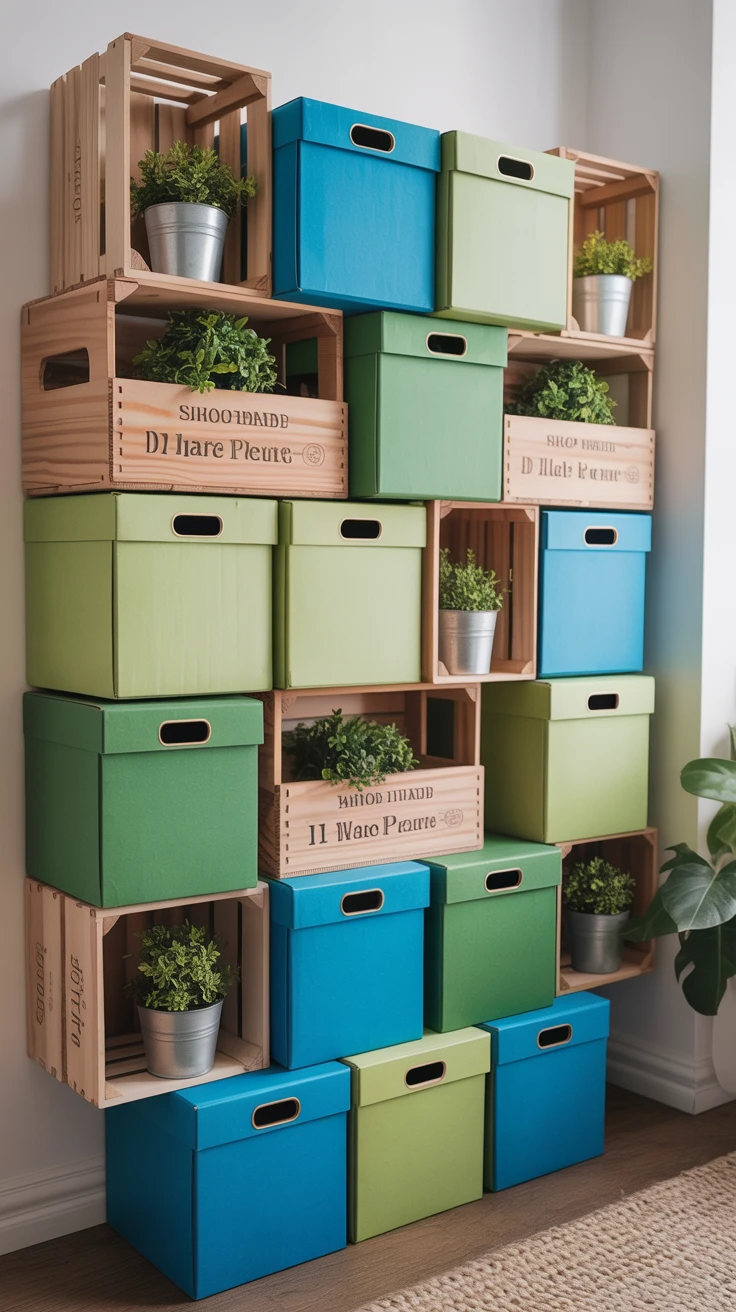
Never underestimate the humble shoebox! When I was in college with a near-zero budget, I created an entire wall of storage using nothing but cardboard shoeboxes and contact paper. I arranged and glued the boxes in a staggered pattern, covered them with decorative paper, and mounted the entire unit to the wall.
Years later, I upgraded this concept using wooden wine crates sourced from a local liquor store. The sturdier construction allowed for heavier items, and the varied sizes created visual interest. Some boxes I mounted with openings facing forward for books, others sideways for displaying plants and decorative objects.
This approach to DIY storage shelves costs almost nothing but delivers impressive results, especially when the boxes are painted in coordinating colors or covered with consistent material to unify the look.
14. Over-the-Door Storage
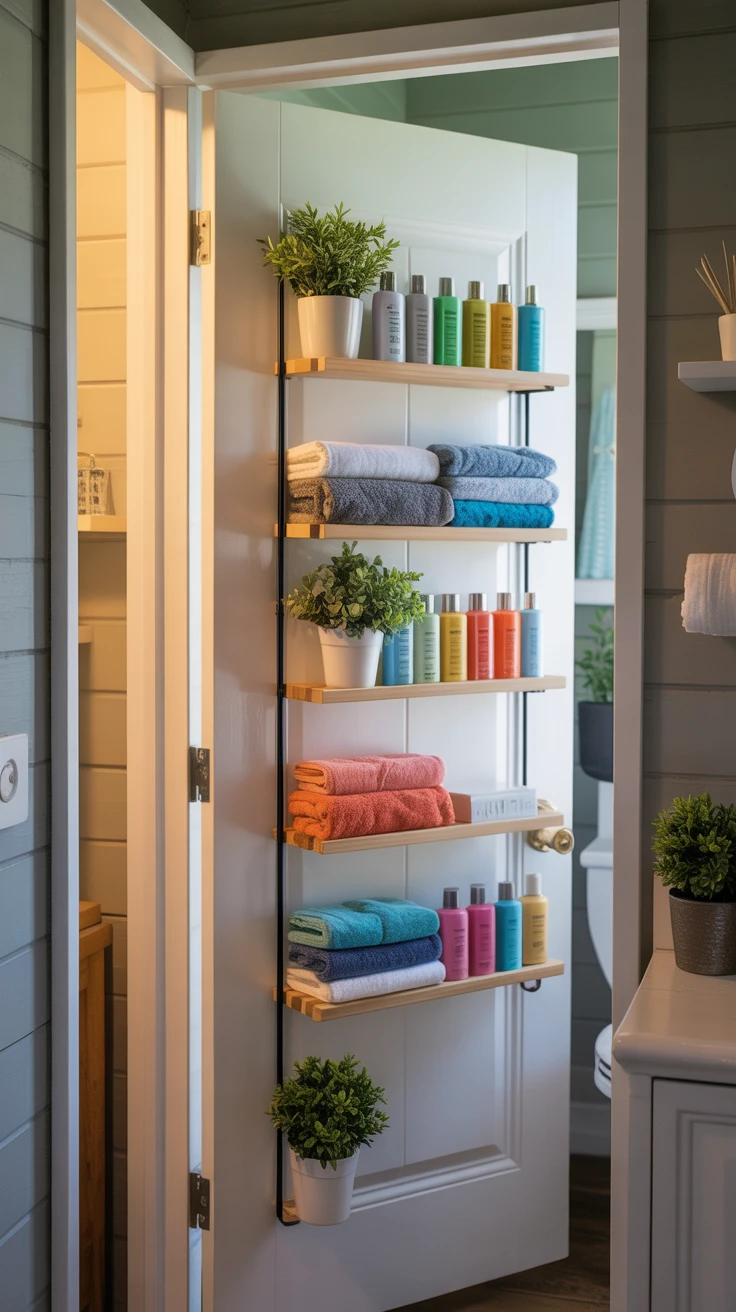
Doors represent significant wall space that often goes unused. In my bathroom, where floor and wall space were extremely limited, I created a custom over-the-door shelving unit that transformed my storage options.
Using 1×4 boards and basic brackets, I built a frame that hooks over the top of the door with shelves spaced to hold everything from towels to toiletries. The unit moves with the door and requires no permanent installation—another rental-friendly solution.
For my pantry door, I created a similar system sized specifically for spice jars and canned goods. This simple project freed up an entire cabinet in my tiny kitchen and made cooking more efficient by keeping ingredients visible and accessible.
Pro Tips for Effective Shelf Design
After numerous shelf-related successes (and a few memorable failures), I’ve developed some guiding principles for effective DIY storage shelves in small spaces:
- Always consider the weight capacity of your materials and mounting methods
- Measure three times, cut once (learned the hard way!)
- In tiny spaces, consider using the same color for shelves as walls to create visual continuity
- Incorporate adjustability when possible to adapt to changing needs
- Don’t forget about lighting—under-shelf LED strips can highlight objects and create ambiance
- Leave some empty space—shelves packed to capacity create visual clutter
- Consider the depth carefully—too deep, and items get lost; too shallow, and they fall off
Pro Tip: Always keep scale in mind. I once built beautiful shelves that were so dominating they made my small room feel like a storage closet. In tiny homes, lighter, more delicate shelving often works better than substantial built-ins.
Frequently Asked Questions
How do I determine the best shelf type for my space?
Consider three factors: the available wall/floor space, what you need to store (size and weight), and your aesthetic preferences. For very small spaces, wall-mounted or floating shelves maximize floor space. For displaying collections, glass or open shelving works well. For hiding clutter, consider hidden storage solutions. I always recommend sketching your space and measuring carefully before deciding.
What tools will I need for basic DIY shelving projects?
Most basic shelving projects require: a tape measure, level, stud finder, drill with various bits, screwdriver, saw (hand or power), sandpaper, and appropriate hardware for mounting. For more advanced projects, a pocket hole jig, miter saw, and orbital sander can be helpful. I started with just the basics and added tools as my skills improved.
Are there ways to ensure my shelves are sturdy and safe?
Absolutely! Always mount shelves to wall studs when possible. For drywall mounting, use appropriate anchors rated for the weight you’ll place on the shelves. Consider the depth-to-weight ratio—deeper shelves can support more weight. For floating shelves, use metal brackets or floating shelf hardware rather than just wood glue and dowels. And always test the strength before loading valuable items.
Can I use recycled materials for all types of shelves?
While recycled materials are wonderful for many projects, consider their structural integrity for weight-bearing shelves. Pallet wood works well for decorative shelving but may not be suitable for heavy book collections. Always clean and treat recycled wood to eliminate pests and splinters. I’ve had great success with reclaimed hardwoods for most applications, but I’m more cautious with softwoods or weathered materials for critical structural elements.
How can I make my shelves aesthetically pleasing?
The key is consistency with your overall decor. Consider painting shelves the same color as your walls for a seamless look, or choose a contrasting color for a bolder statement. Pay attention to the edges and corners—rounded edges feel more finished than sharp ones. And remember that what you put on the shelves matters as much as the shelves themselves. I follow the rule of thirds when displaying items: group in odd numbers, vary heights, and leave some empty space.
